
- Troubleshooting Missing Styles in Session Replay & Heatmaps
- Sigmize Workspaces User Guide
- Cloning an Experiment in Sigmize
- Sigmize Experiment Lifecycle Guide
- User Profile Management Guide
- How to Invite Members to a Workspace in Sigmize
- How to Switch Organizations in Sigmize
- Let’s set up Organization & Workspace with Sigmize
- Getting Started with Sigmize
- How to Install and Connect the Sigmize WordPress Plugin
Let’s Setup Goals in Sigmize
What are Goals in Sigmize?
Goals in Sigmize represent the success metrics you want to track for your experiments. They allow you to measure how well each variant performs by capturing user actions such as clicks, form submissions, purchases, or any other meaningful interaction. By setting up the right goals, you gain clear, data-driven insights into which variant delivers higher conversions, helping you optimize your pages and funnels with confidence.
You can get to the Goals section by following the pointers below –
- Log in to your Sigmize account.
- From the dashboard, click on Create Experiment.
- Add your basic details, then click Continue to Variants.
After adding the variants you want to track, click Continue to Goals.
Here’s a detailed guide on how to set up goals for your experiment:
Below are the different types of goals you can configure:
- You can select Scroll Depth and set the percentage at which a conversion is recorded. You also have the option to allow multiple conversions for the same visitor.

- Next, select Time Spent on Page, set the desired duration for the test, and check the option to allow multiple conversions for the same visitor if needed.

- You can select the Page View goal, enter the specific page URL to track visitor activity, and enable the option to allow multiple conversions for the same visitor if needed.

- Next, you can set up Element Views as a goal by adding the element’s ID, Class, or CSS selector to track conversions.
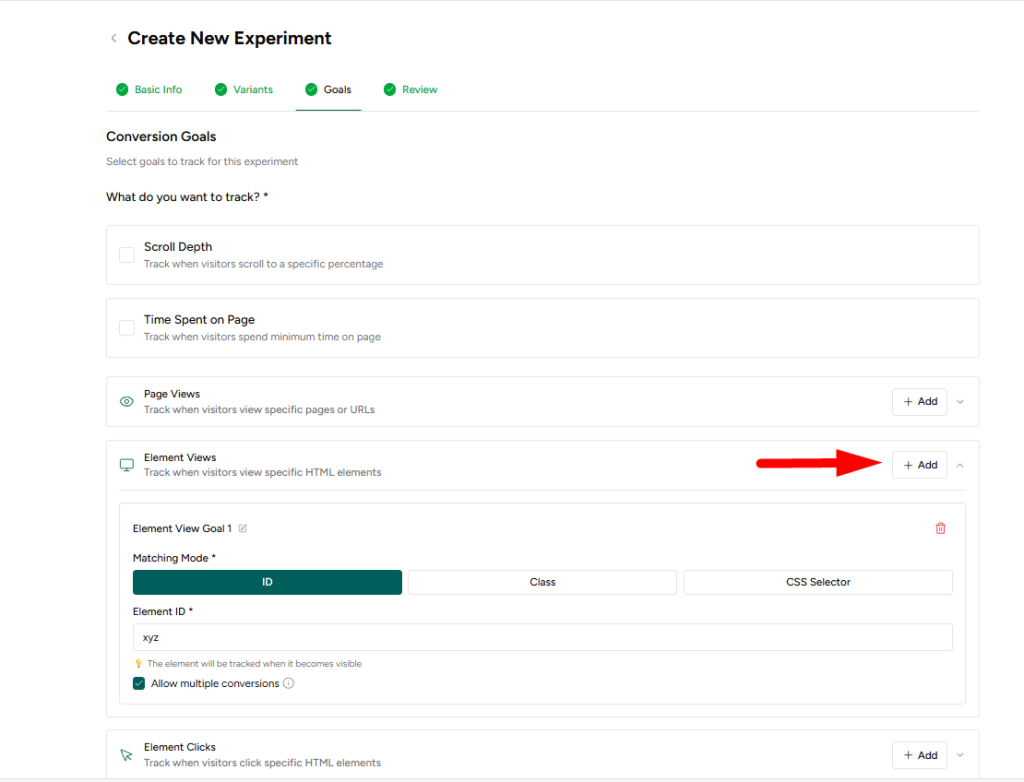
- Next, you can set up Element Clicks as a goal—each time a visitor clicks on the specified HTML element, it will count as a conversion.

- Next, add External Links to track conversions when visitors click and are redirected to those links.

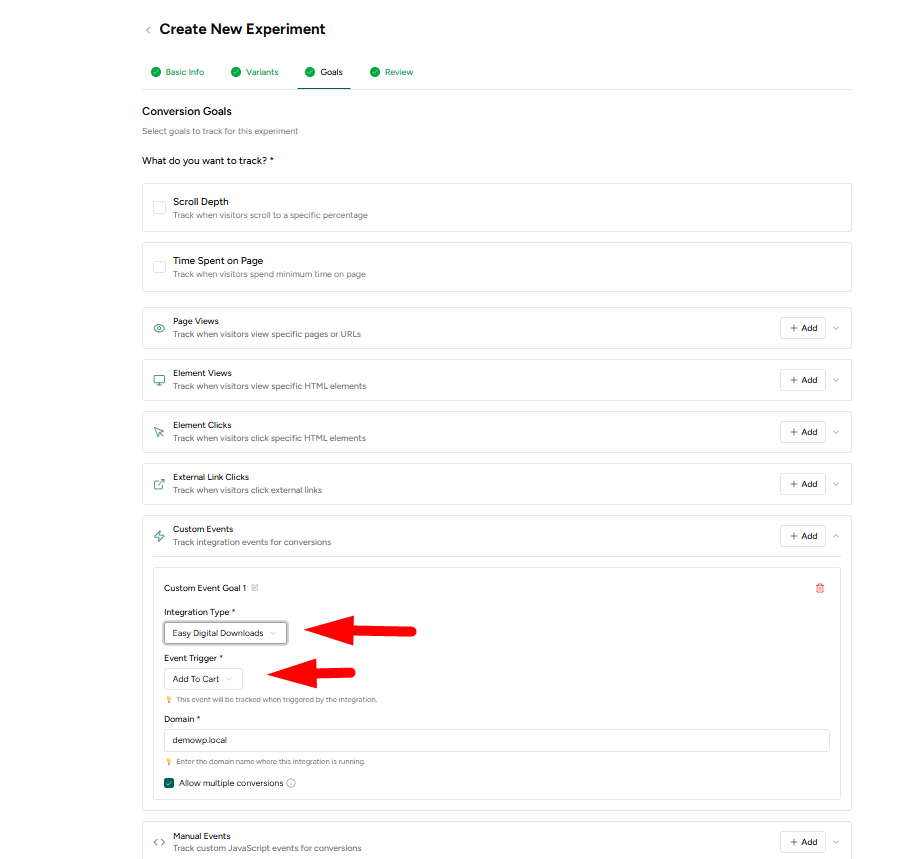
- Next, you can add a Custom Event Goal, which currently integrates with EDD, WooCommerce, and SureCarts. Use the trigger option to specify the event and product that will count as a conversion.
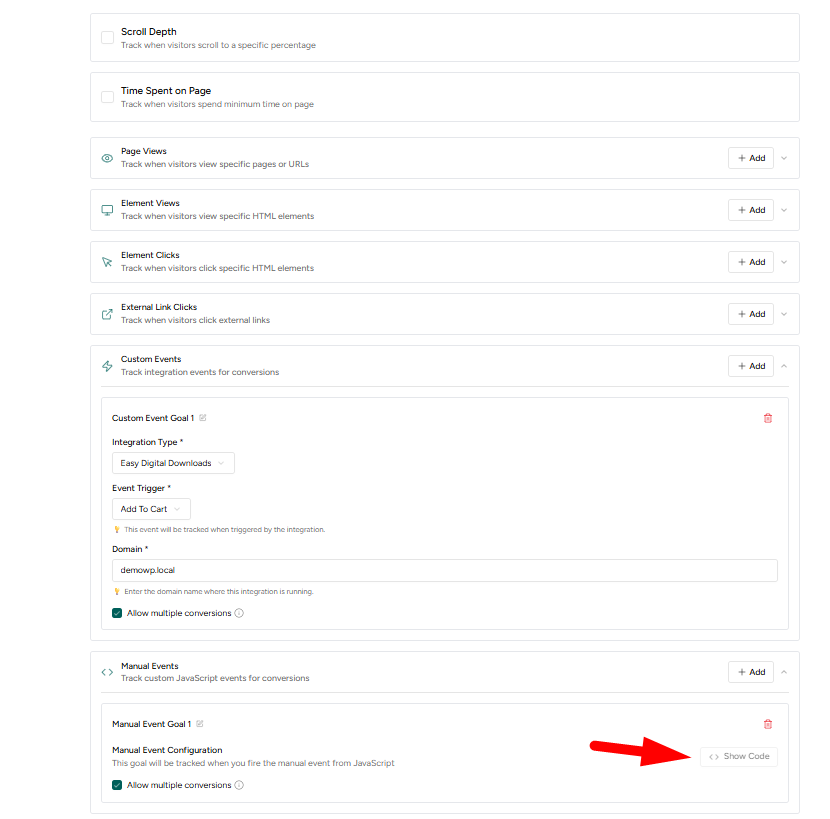
- Finally, there is the Manual Events Goal, which allows non-WordPress users to receive tracking codes after the experiment is published. These codes can be added to their site to track conversions.
That’s it!
We hope this guide helps you successfully set up your goals for experiments.
Need Help?
If you have any questions or need help with the setup, don’t hesitate to contact our support team. We’re always happy to assist!
We don't respond to the article feedback, we use it to improve our support content.